
Got troubled by the problem when importing Sony PXW-Z100 XAVC footage into Adobe Premiere Elements? Here you will find the easy and the cheapest way to convert Sony PXW-Z100 XAVC to Premiere Elements edit-friendly format in order to have a smooth workflow.

Sony professional camcorder PXW-Z100 appeal to lots of videographers and film-makers. It is featured with Full HD XAVC Intra and XAVC Long GOP, a recording format unveiled by Sony. However, users find it’s difficult to import XAVC to Adobe Premiere Elements or other NLE system. This article focuses on the Sony PXW-Z100 to Adobe Premiere Elements workflow, helping you to outline the best way to work XAVC files in Premiere Elements.
According to Adobe’s official site, I know that to import Sony PXW-Z100 XAVC footage to Adobe Premiere Elements for editing, the best way here is to convert XAVC to MPEG-2, the most compatible video format for Adobe Premiere Elements (no matter Elements 15, 14, 13, 12 or Premiere Elements 2018). UFUShare Video Converter (Windows/Mac) is the third-party tool I applied.Besides Premiere Elements, this software can also encode XAVC-I/XAVC-L to DNxHD for Avid, ProRes for FCP, AIC for iMovie/FCE and more NLE systems for native editing. Just get the right version according to your computer’s OS and follow the step-by-step guide below to convert the PXW-Z100 XAVC videos to Adobe Premiere Elements easily.
For Windows 7/8/8.1/10/Vista Users :


For MacOS 10.13 High Sierra, MacOS 10.12 Sierra, Mac OS X 10.11 El Capitan, 10.10 Yosemite, 10.9 Mavericks, 10.8 Mountain Lion and 10.7 Lion ect Users :

How to Convert Sony PXW-Z100 XAVC files to Adobe Premiere Elements for editing on Windows or Mac?
Part 1. How to Import Sony PXW-Z100 XAVC files to Adobe Premiere Elements for editing on Windows?
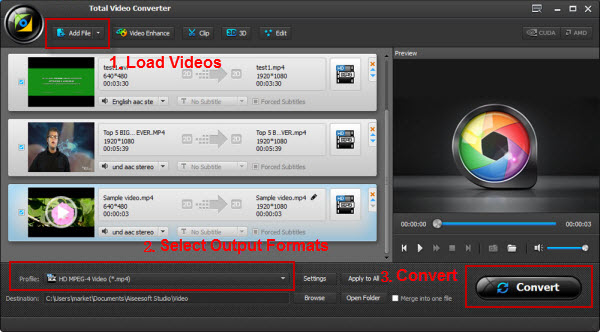
Step 1: Add original files .
Download, install and run the Video Converter for Windows; click “Add Videos” icon to load your source XAVC videos from Sony PXW-Z100.
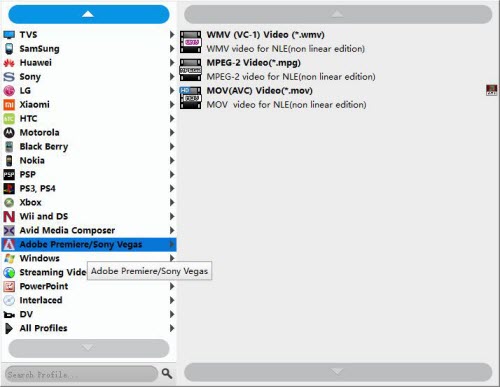
Step 2: Choose preferred format.
Click “Format” pull down list to select Adobe Premiere/Sony Vegas> MPEG-2(*.mpg) as the best video format for Premiere Elements. WMV, MOV formats are the good choice as well.
Tips:
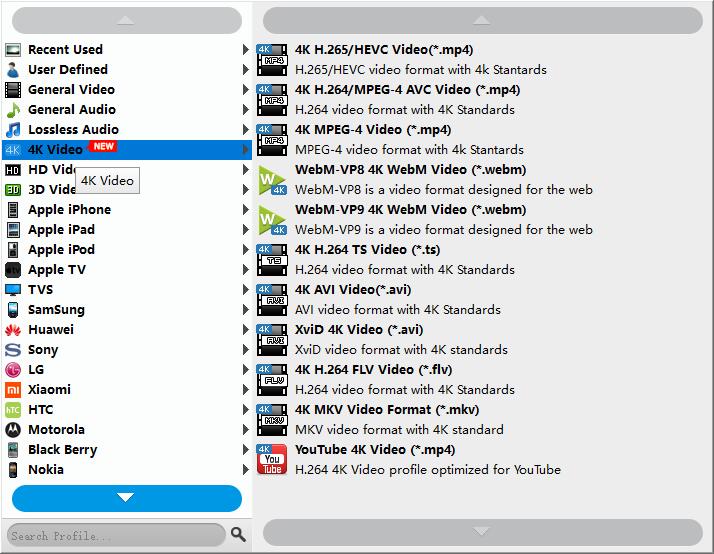
1. If your source video is 4K and you want to keep its original quality, you can select “4K Video” > “4K H.264/MPEG-4 AVC Video (*.mp4)” as target format for use in Premiere Elements. To select 4K H.264 as output, please make sure your computer has enough power to handle 4K H.264.
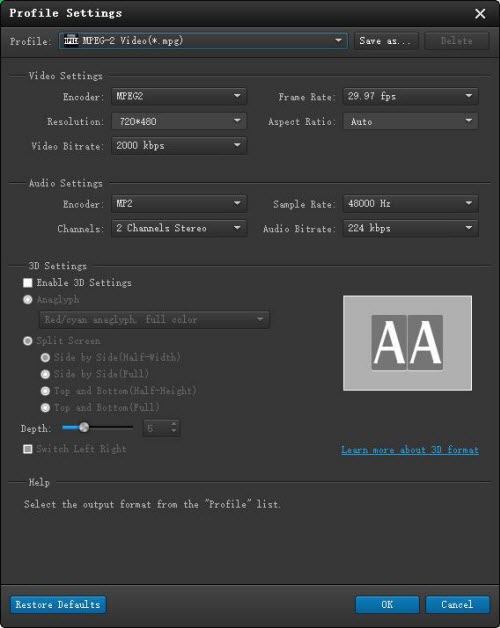
2.You can click “Settings” button to modify video and audio parameters like encoder, resolution, frame rate, bitrate, aspect ratio, sample rate, and audio channels. You can also “Enable 3D Settings” to add 3D effect to your source media.
Step 3: Start conversion.
Click the Convert button to start transcoding Sony PXW-Z100 XAVC to MPEG-2 for Adobe Premiere Elements. After the conversion is complete, get the resulted files via clicking the Open button and then you can import Sony PXW-Z100 XAVC to Adobe Premiere Elements for further editing without any hassle.
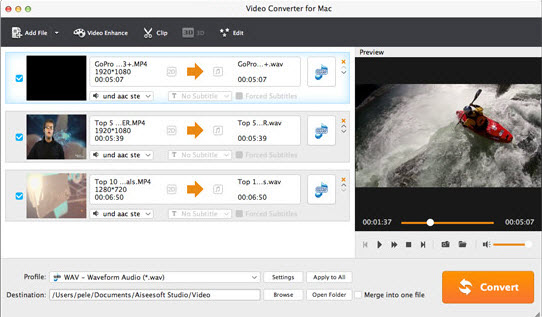
Part 2. How to transcode Sony PXW-Z100 XAVC files to Adobe Premiere Elements for editing on Mac?
Step 1 :Download, install and run the Video Converter for Mac; click “Add Videos” icon to load your source XAVC videos from Sony PXW-Z100.
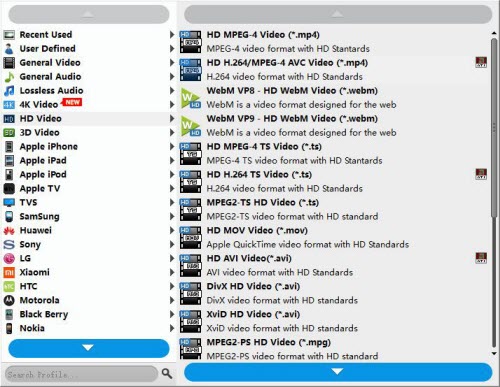
Step 2: The program has three already optimized the video settings for Adobe Premiere Elements. You can select MOV, WMV or MPEG-2 from “HD Video” as the output format. Here we recommend you choose MPEG-2. The output videos will keep the original quality of the MP4 video and seamlessly fit Adobe Premiere Elements etc.
Tips:
1. If your source video is 4K and you want to keep its original quality, you can select “4K Video” > “4K H.264/MPEG-4 AVC Video (*.mp4)” as target format for use in Premiere Elements. To select 4K H.264 as output, please make sure your computer has enough power to handle 4K H.264.
2.You can click “Settings” button to modify video and audio parameters like encoder, resolution, frame rate, bitrate, aspect ratio, sample rate, and audio channels. You can also “Enable 3D Settings” to add 3D effect to your source media.
Step 3: Click the “Convert” icon under the preview window, and the video converter for Mac will start converting Sony PXW-Z100 XAVC to Adobe Premiere Elements on Mac.
When the conversion is finished, you can click “Open” button to get the generated MPEG-2 files effortlessly. Afterwards, you can launch your editing program to import converted XAVC clips into Premiere Elements 15/14/13/12 or Premiere Elements 2018 for further editing.
