
Huawei, as the leading brand of smartphone in China is also doing better and better in the field of high-end smartphone. Like Huawei P9, as the great mate of HUAWEI.
“I always keep the habit of viewing these photos on my Huawei P9 when I am free. But, yesterday, I did the foolish thing that I deleted all these precious photos by pressing on deleted button carelessly. I just need some help to restore those deleted photos from my Android Huawei P9 phone. Please don’t ask me why I did this! It is really the most stupid thing I have ever done!”– Mario
Huawei P9 is definitely a smart phone worth looking forward to. However, our topic today is not data transfer, but data recovery. In our daily use of Huawei P9 mobile phone, data loss problem such as accidently deleting data and so on is very common, but in the face of such a serious problem, we must learn some effective methods of data recovery. To recover lost and deleted data from Huawei P9, Huawei Data Recovery is your best and reliable choice.
UFUShare UFUShare Android Data Recovery for Windows or Mac (Recover Data from Huawei P9) is an outstanding data recovery program that enables user directly retrieve lost and deleted data like contacts, photos, videos, SMS, WhatsApp chats, text messages, calendar and more from almost all Huawei smartphones including Huawei P9 with ease. Besides, you are allowed to backup and restore your Huawei P9 data via this tool, and permanently wipe all data on your old Huawei without restored.
 Download Huawei P9 Data Recovery for Windows:


 Download Huawei P9 Data Recovery for Mac:

Steps to Recover Deleted & Lost Data from Huawei P9
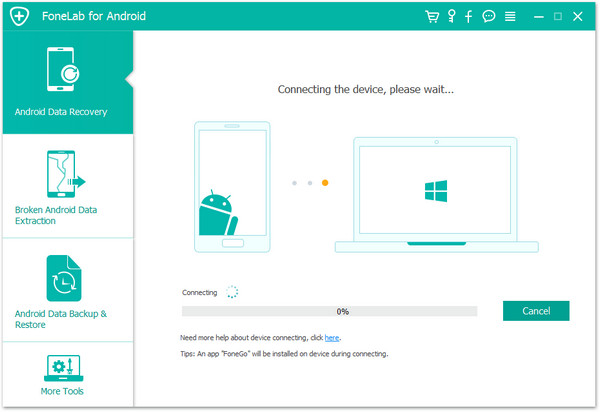
Step 1. Launch the program and connect your Huawei P9
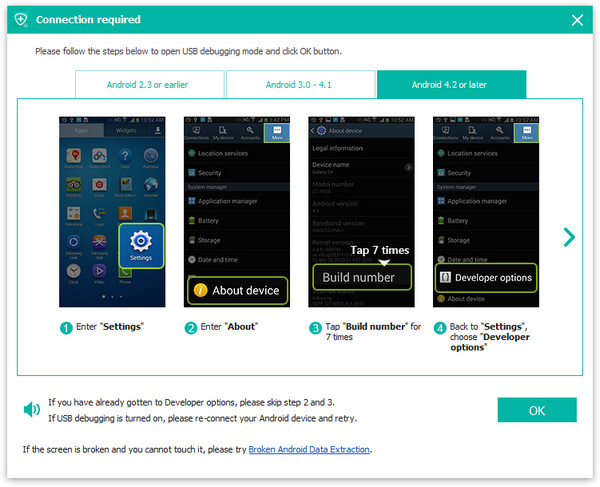
First of all, launch Android Data Recovery and choose the “Data Recovery” function. Then open the USB debugging in your Huawei P9 and connect it to computer with a USB cable.
If you’ve never opened it before, you can follow the step in the window. If your Android os version is 4.2.2 or above, there will be a pop-up message on your phone, and you just need to allow it to open USB debugging.
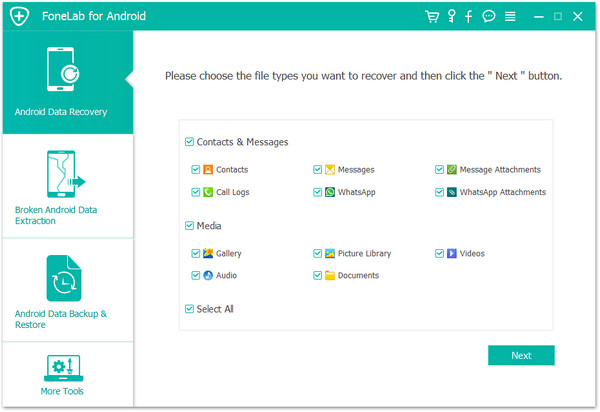
Step 2. Select the types of files as you like
Then the program will display the data you can select to recover. You can check what data you want and click “Next” to continue.
Step 3. Choose the scan mode and scan your Huawei P9
The program will scan your Android phone to find the lost data. But before that, you should choose a scan mode between “Standard Mode” and the “Advanced Mode”. I recommend you choose “Standard Mode”, because it can work faster. Unless it doesn’t find the files you are looking for, you can try “Advanced Mode”. Then click “Start” to begin the scan process.
Step 4. Preview and recover the lost data from Huawei P9
When the scan process completed, the program will display the result for you. You can choose the type of files on the left menu and preview the details on the right side. Then check them and mark the data you want, finally click “Recover” to save them on computer.
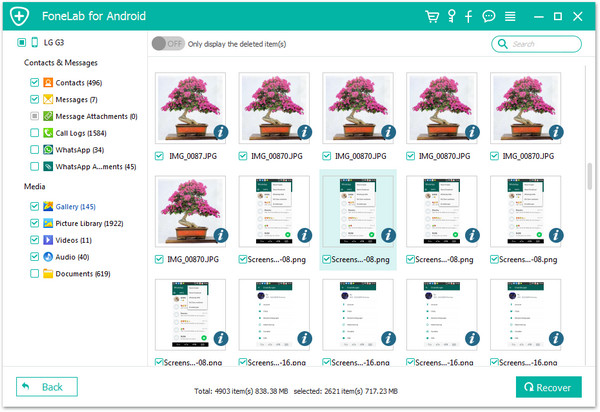
Notes: The found data contains the existing and the deleted. If you want to separate existing and deleted data, turn on the button of “Display deleted files only” or use the search function on the top right to search what you need in the scan result.
