
“How can I extract the audio files contained in a DVD-Audio (DVD-A) disk into WMA format in Mac so that they can be played on my network along with all my other music files?”
Do you want to enjoy fantastic audios of DVD or DVD movies? Are you wondering how to rip some DVD videos to a audio format ideally as WMA? If so, this article will guide you how to rip DVD to WMA.
UFUShare DVD Ripper for Windows or Mac, which is a free DVD to WMA converting software to freely convert DVD to WMA on Windows 10/8.1/8/7/Vista/XP or Mac OS X(macOS 10.14 Mojave included). Free download this DVD to WMA Converter to rip DVD to WMA, and put it on your WMA players. It also supports other audio format. Besides the functions of converting DVD to WMA, you also can trim your favorite clips to your WMA players, merge several files into one for your music enjoyment, snapshot the lovely picture, etc.
- Free convert DVD to WMA
- Edit your audio file – trim, merge…
 Download DVD Ripper for Windows:


 Download DVD Ripper for Mac:

How to Rip DVD to WMA on Windows PC with DVD to WMA Ripper?
Step 1: Download UFUShare DVD to WMA Converter for Windows
This Windows DVD to WMA converting software has no spyware or adware. It is absolutely safe and clear to install and run. It has two versions including Windows.
Step 2: Load DVD file
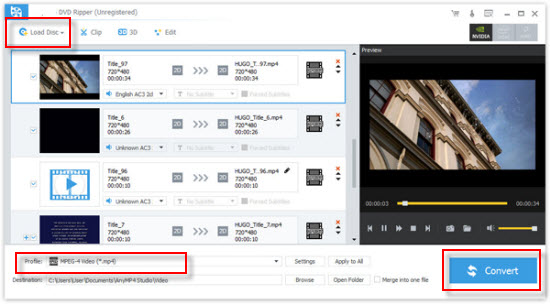
After installing it, click the Load Disc button in the upper left corner, select Load DVD Disc, Load DVD Folder or Load IFO Files in the drop-down list.
Step 3: Choose output format
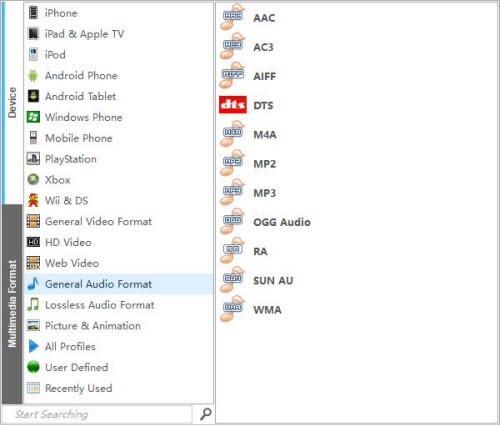
Based on the formats supported by your portable devices, you can select the output format such as WMA from the “Profile” column and set the destination folder. Also you are allowed to select your preferred audio track.
Step 4: Adjust output settings
Detailed video and audio settings are provided by this Windows 10/8/7 DVD Ripper for you to adjust, such as video Encoder, Frame Rate, Resolution, Bitrate and audio Encoder, Channels, Bitrate, Sample Rate, etc. Even more, you can input your own parameters. The well-customized profile can be saved as “User-Defined” for your later use.
Step 5: Convert DVD to WMA on Windows 10/8/7/Vista/XP PC
The last step is just one click on the button of Convert. It just needs few minutes to rip. Now you can enjoy nice music or song on your phone when you run or walk for relaxation.
How to Convert DVD to WMA on Mac with DVD Ripper for Mac(macOS 10.14 Mojave included)?
Step 1: Add DVD files
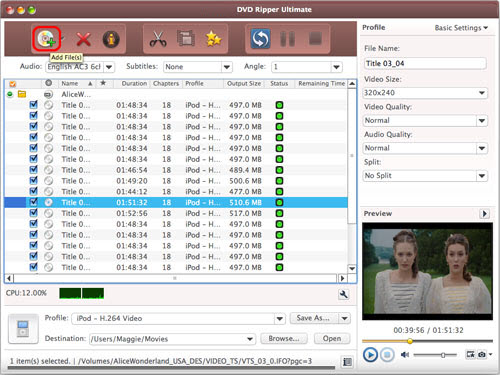
Launch the UFUShare Mac DVD Ripper software, and add DVD files by selecting “Add Files” button.
Or, click “Add File(s)” drop-down button, “select Other Folder…” option, select a DVD folder in the file dialog box that opens, and load it.
Click “Add File(s)” drop-down button, select “Open IFO Files…” option, select an IFO file in the file dialog box that opens, and load it.
Step 2: Select WMA as output format
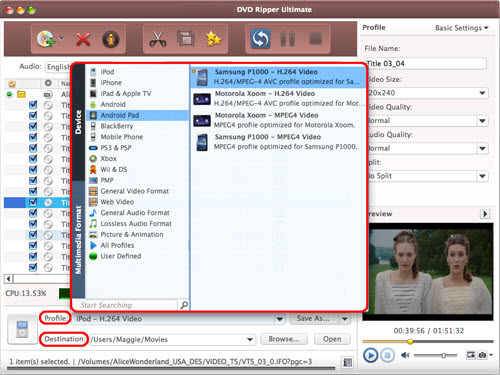
Select the files need to be converted and click “Profile” button to select the output format WMA in the drop-down list. Then click “Browse…” button to specify destination folder for saving output files.
Step 3: Set Output Directory
To rip DVD to WMA, click the “Convert” button and a sidebar with “Save to” will pop up. Choose the target output directory.
Step 4: Start Mac DVD to WMA conversion
Simply click the green “Convert” button at the bottom of the side bar to initiate the conversion. After it finishes, the process of converting DVD audio to WMA on Mac is completed.
