
Canon XF100 is a hot product for recording videos, which use MXF as video recording format. Material eXchange Format (MXF), wrapping video and audio with metadata in a single file that maintains access to critical information throughout the production process. However, the MXF footage from the Canon XF100 is not an ideal format for most non-linear editing systems (NLE) including Final Cut Pro, Adobe Premiere, Avid, iMovie, etc. Although Canon XF100 provides some plugins, it seems that the process is complex and sometimes you will encounter different importing issues like import slowly, no audio after importing, etc. Fortunately, there is an easy way to fix the problems. Find it out here.
Actually, it’s not as difficult as you imagine. What you need is just a common video converter like UFUShare Video Converter for Mac, which can be used as a professional and easy-to-use Canon XF100 MXF Converter for Mac. The program can help you transcode Canon XF100 MXF footage to various professinal encoders, Apple Intermediate Codec, ProRes and DNxHD, DVCPRO, HDV – ensuring maximum editing quality and efficiency when working with iMovie, Final Cut Pro, Avid Media Composer or Adobe Premiere and more. Plus, with advanced audio and video in sync technology, the program is able to guarantee audio and video matching very well. Now just get the program and follow the step-by-step guide below to convert and import Canon XF100 MXF footage to FCP X, FCP 7, Adobe Premiere Pro CC/CS6, Avid Media Composer, iMovie for editing smoothly.
 Download Video Converter for Mac:


 Download Video Converter for Windows:

How to import Canon XF100 MXF footage to FCP, Premiere, Avid and iMovie, etc?
Step 1. Load the Canon XF100 MXF footage
Download, install and launch UFUShare Video Converter for Mac, and import Canon XF100 MXF files into the program.
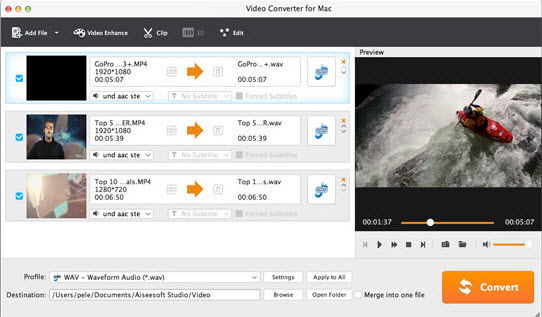
Note: Before conversion, you need to transfer MXF files from your Canon XF100 to Mac Hard Drive, then click the “Add Video” button to browse to import Canon XF100 MXF videos.
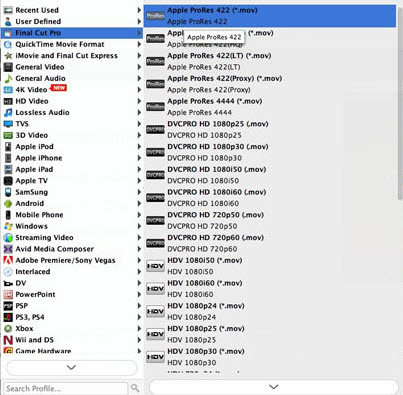
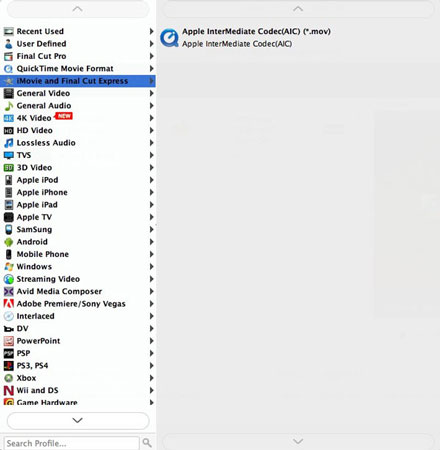
Step 2. Select output format
By running UFUShare Video Converter for Mac, there is no need to set the codec yourself, the program has optimized presets for Final Cut Pro, Avid, Adobe Premiere and iMovie, etc.
To bring your the Canon XF100 MXF footage to Final Cut Pro X/7/6, click on the “Editing Software” and have “ProRes” or “Final Cut Pro” (the same output) be your selected output format.
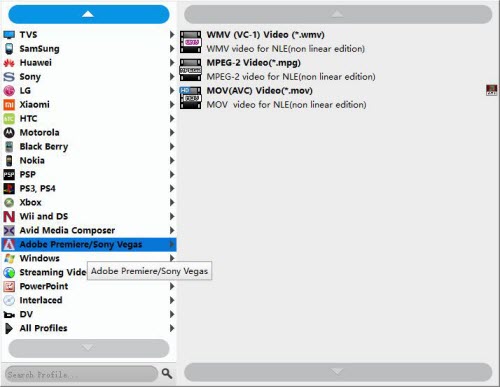
To work your Canon XF100 MXF footage in Premiere CC/CS6/CS5, simply choose “MPEG-2” as the output format from “Editing” software.
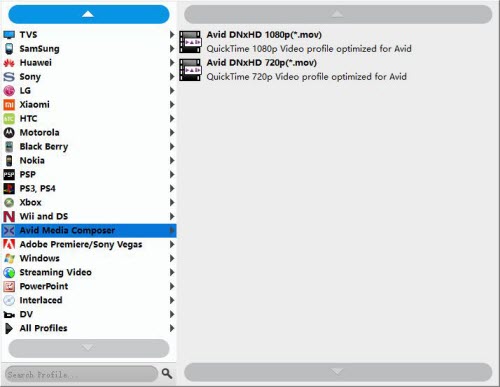
To edit the Canon XF100 MXF footage footage in Avid smoothly, choose “DNxHD” for the output.
To edit the Canon XF100 MXF files in iMovie, choose “AIC” for the output.
Step 3. Start transcoding Canon XF100 MXF to FCP, Avid, Premiere or iMovie, etc
Finally, click the “Convert” button to start the conversion process. After a while, your files will be converted into a more editing-friendly format ready to be imported into FCP, Premiere, Avid, iMovie, etc.
Now importing and editing Canon XF100 MXF footage in Final Cut Pro 7, FCP X, Premiere Pro CC/CS6/CS5.5/CS5, Avid Media Composer, iMovie is flawless.
